Quickstart
This quickstart guide will guide you through the necessary steps for building Oxygen plugins.
The guide explains three necessary steps:
Setup of a development environment
Compiling OXYGEN-SDK
A new plugin: Hello World
Lets start with the setup of the development environment:
Visual Studio 2019 or better (for Windows)
cmake
Oxygen
A free alternative to Visual Studio 2019/2022 is Visual Studio Code.
Install Oxygen
To test the plugins an Oxygen installation is needed:
Please download and install the latest Oxygen installer from DEWETRON’s download portal:
https://www.dewetron.com/products/oxygen-measurement-software/
Development Requirements for Windows
Microsoft Visual Studio 2019 or later with C++ compiler and toolchain (https://visualstudio.microsoft.com/)
CMake (https://cmake.org/download/)
Source files for Boost C++ Libraries 1.70 or later (https://www.boost.org/users/history/version_1_70_0.html)
Git for windows or https://desktop.github.com/ application
Make sure Visual Studio and CMake are installed.
Please verify that the cmake command can be run from the command prompt.
If this does not work you have use the ‘Add CMake to the system PATH’ option
during installation or add it to the PATH manually.
C:\> cmake --version
cmake version 3.16.4

CMake suite maintained and supported by Kitware (kitware.com/cmake).
Optional Requirements
For resource package creation the qt resource compiler (rcc) is needed.
It is found the GitHub projects download section:
https://github.com/DEWETRON/OXYGEN-SDK/releases/download/OXYGEN-SDK-6.0.0/qt_resource_compiler.zip
Alternatively one can install the complete Qt libraries package:
Qt 5.15.2 (https://www.qt.io/download-qt-installer)
Qt is a rather large download (40GB with included debug symbol files) so the use of the small provided qt_resource_compiler.zip archive is preferred.
Development Requirements for Linux
Ubuntu 20.04 LTS Linux (Focal Fossa)
Red Hat Enterprise Linux 8 (RHEL8)
The minimum build environment for Linux consists of following packages:
cmake
gcc/g++
boost
qt-dev
make
ninja (optional)
It is completely ok to use the packages provided by the distribution.
Optional Requirements for Linux
A good and free IDE for Linux (and Windows too) is Visual Studio Code. The download is free and its usage is highly recommended.
Build instructions for Windows
It is assumed that https://github.com/DEWETRON/OXYGEN-SDK is cloned to this directory: C:\OXYGEN-SDK.
Alternatively you can download a zip archive:
https://github.com/DEWETRON/OXYGEN-SDK/archive/refs/heads/master.zip
Git clone using cmd.exe
C:\> cd C:\
C:\> git clone https://github.com/DEWETRON/OXYGEN-SDK.git OXYGEN-SDK
Git clone using GitHub Desktop
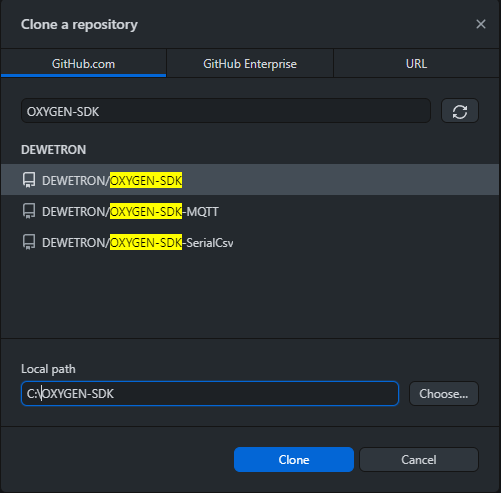
Fig. 3 Cloning with GitHub Desktop
Easy workspace setup using setup.py (Optional)
C:\OXYGEN-SDK\setup.py is a utility script automating the following steps.
It downloads and setups all 3rdparty tools and libraries:
Boost 1.70.0
CMake
Qt resource compiler
setup.py needs python3 to be installed. Using setup.py is completely optional: All the steps necessary can be done manually.
C:\> cd C:\OXYGEN-SDK
C:\> python setup.py
Boost 1.70.0 dependency processing ...
Qt resource compiler (rcc) dependency processing ...
CMake 3.23.1 dependency is fullfilled!
When using setup.py Workspace setup step by step can be skipped.
Workspace setup step by step
Setup Boost libraries
If setup.py was not used or did not succeed
Extract the Boost source archive to C:\OXYGEN-SDK\3rdparty.
Verify that the file
C:\OXYGEN-SDK\3rdparty\boost_1_70_0\boost\align.hpp exists
to make sure the extracted paths are correct.
Setup Qt resource compiler
If setup.py was not used or did not succeed
Unpack qt_resource_compiler.zip to C:\OXYGEN-SDK
Or: Qt 5.15.2 has to be installed on the system. This manual assumes the correct build for your compiler is installed to {QT_DIR} (for example C:\Qt\5.15.2\msvc2017_64)
Building with Visual Studio
Open a command line prompt and change to the directory C:\OXYGEN-SDK
Create a new directory build and change to C:\OXYGEN-SDK\build
C:\> cd C:\OXYGEN-SDK
C:\OXYGEN-SDK> mkdir build
C:\OXYGEN-SDK> cd build
Using cmake we create a Visual Studio solution:
C:\OXYGEN-SDK\build> cmake -A x64 ..
The option -A x64 forces the solution to build for 64bit architecture. It may not be necessary, but sometimes a x86 (32bit) solution is created and Oxygen is not able to load the plugins.
If your are using a qt installation instead of the qt_resource_compiler package please call cmake like this:
C:\OXYGEN-SDK\build> cmake -A x64 -DCMAKE_PREFIX_PATH={QT_DIR} ..
If CMake encounters an error, you need to fix the issue and then invoke
C:\OXYGEN-SDK\build> del CMakeCache.txt
before retrying to ensure a clean run.
Open the generated Solution in Visual Studio
C:\OXYGEN-SDK\build> start ODK.sln
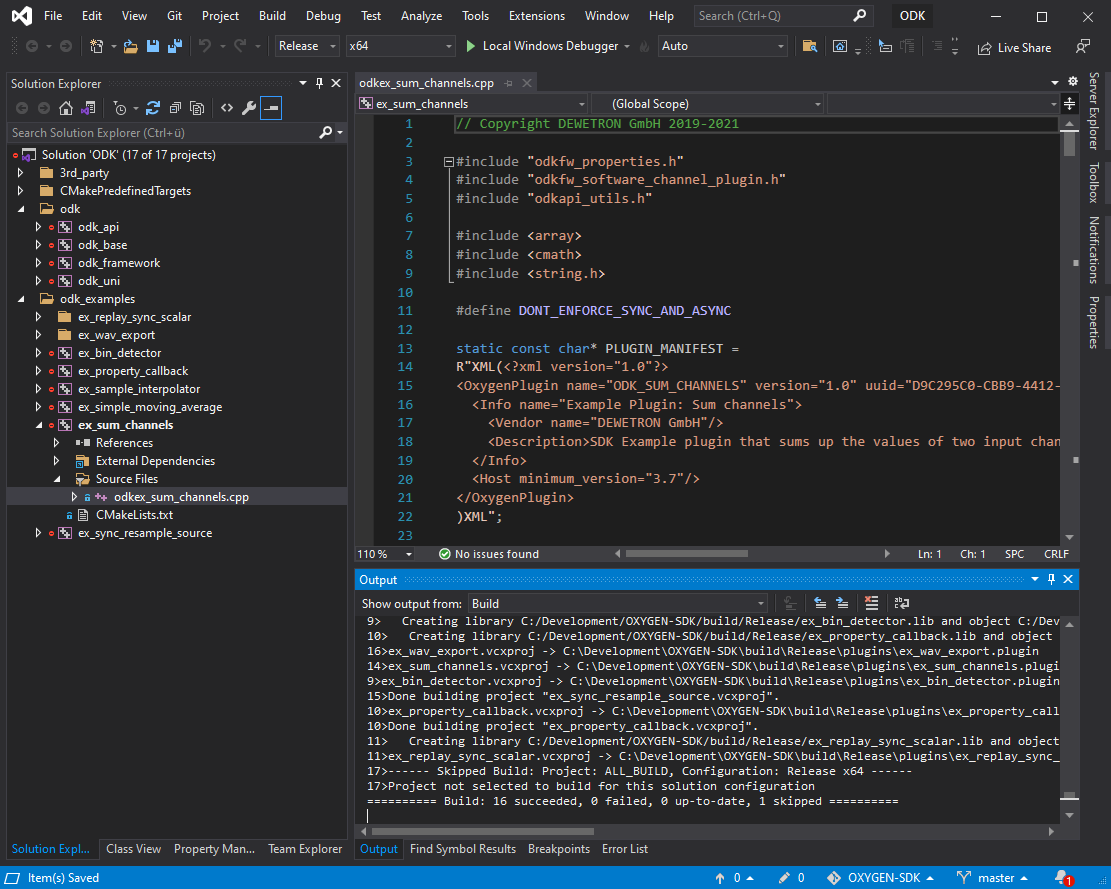
Fig. 4 Visual Studio 2019 ODK solution
Build at least one of the example plugins. Build Solution will build everthing.
The compiled plugins will be stored in
C:\OXYGEN-SDK\build\{Debug|Release}\plugins
as files with the extension .plugin
To test a plugin it has to be copied to {PublicDocuments}\Dewetron\Oxygen\Plugins
or the ‘bin’ directory of the installed Oxygen (by default this is
C:\Program Files\DEWETRON\Oxygen\bin).
Start Oxygen and the plugin will automatically load.
This can be verified by looking at ‘System Settings’ -> ‘Extensions and Plugins’ -> ‘Overview’
Attention
Oxygen is a 64bit application (x64) and is not able to load plugins build for a 32bit (x86) architecture.
Please check the build configuration in Visual Studio if your plugin fails to load. Add -A x64 to the cmake call.
Build instructions for Linux
It is assumed that https://github.com/DEWETRON/OXYGEN-SDK is cloned to the directory refered to as WORKSPACE:
PC$ cd $HOME
PC$ git clone https://github.com/DEWETRON/OXYGEN-SDK.git OXYGEN-SDK
The directory /home/USER/OXYGEN-SDK has been created containing the latest
SDK version.
Building with commandline tools
Enter the OXYGEN-SDK directory and execute cmake to check for all necessary dependencies and let it create a Makefile.
PC$ cd $HOME/OXYGEN-SDK
PC$ mkdir build
PC$ cd build
PC$ cmake ..
-- The C compiler identification is GNU 9.4.0
-- The CXX compiler identification is GNU 9.4.0
-- Check for working C compiler: /usr/bin/cc
-- Check for working C compiler: /usr/bin/cc -- works
-- Detecting C compiler ABI info
-- Detecting C compiler ABI info - done
-- Detecting C compile features
-- Detecting C compile features - done
-- Check for working CXX compiler: /usr/bin/c++
-- Check for working CXX compiler: /usr/bin/c++ -- works
-- Detecting CXX compiler ABI info
-- Detecting CXX compiler ABI info - done
-- Detecting CXX compile features
-- Detecting CXX compile features - done
-- ODKROOT = /home/USER/OXYGEN-SDK
-- Performing Test _HAS_CXX17_FLAG
-- Performing Test _HAS_CXX17_FLAG - Success
-- Checking C++11 support for "constexpr"
-- Checking C++11 support for "constexpr": works
-- GITHUB_REPO = True
-- Found Boost: /usr/lib/x86_64-linux-gnu/cmake/Boost-1.71.0/BoostConfig.cmake (found version "1.71.0")
-- Qt found
-- Configuring done
-- Generating done
-- Build files have been written to: /home/USER/OXYGEN-SDK/build
Now run make to build the SDK and all example plugins
PC$ make
Scanning dependencies of target pugixml
[  1%] Building CXX object 3rdparty/pugixml-1.9/CMakeFiles/pugixml.dir/__/src/pugixml.cpp.o
[  2%] Linking CXX static library ../../Debug/libpugixml.a

lines skipped

[ 98%] Linking CXX shared library ../../Debug/plugins/libex_wav_export.plugin
[100%] Built target ex_wav_export
After building all plugins are found here:
Debug: OXYGEN-SDK/build/Debug/plugins/
Release: OXYGEN-SDK/build/Release/plugins/
PC$ ls build/Debug/plugins/
libex_bin_detector.plugin
libex_property_callback.plugin
libex_replay_sync_scalar.plugin
libex_sample_interpolator.plugin
libex_simple_moving_average.plugin
libex_sum_channels.plugin
libex_sync_resample_source.plugin
libex_wav_export.plugin
Building with Visual Studio Code
It is highly suggested that following Visual Studio Code extensions have been installed:
C/C++
CMake Tools
alternatively: C/C++ Extension Pack
Please note that Visual Studio Code is also a good working IDE for Windows.
Start Visual Studio Code

Fig. 5 Visual Studio Code
Select Open Folder and select /home/USER/OXYGEN-SDK. On the first start
Visual Studio Code asks which compiler (or Kit) to use.
Select 9.3 or 9.4, both work great.
Note
Most modern compilers will work, as far as C++ 17 is supported.
Usually cmake is automatically run by the IDE.
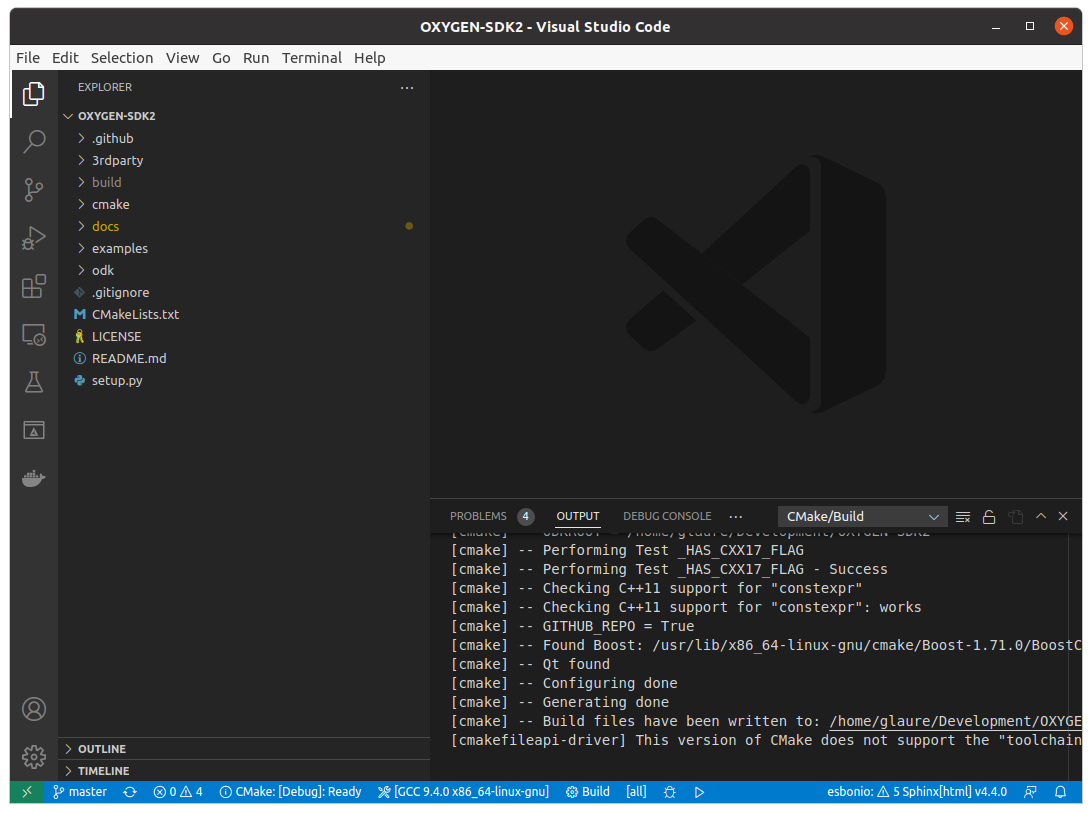
Fig. 6 Visual Studio Code after cmake
Press Build in the bottom bar to trigger the compilation of the Oxygen-SDK framework and all example plugins. There is also the option to switch between Release and Debug build.

Fig. 7 Visual Studio Code Building
After building all plugins are found here:
Debug: OXYGEN-SDK/build/Debug/plugins/
Release: OXYGEN-SDK/build/Release/plugins/
PC$ ls build/Debug/plugins/
libex_bin_detector.plugin
libex_property_callback.plugin
libex_replay_sync_scalar.plugin
libex_sample_interpolator.plugin
libex_simple_moving_average.plugin
libex_sum_channels.plugin
libex_sync_resample_source.plugin
libex_wav_export.plugin
Hello World plugin
The first plugin will be a variant of the classic “Hello World” programming example.
To start the development a project directory for our new development has to
be created: C:\OXYGEN-PLUGINS\Hello_World
Our plugin directory has to be populated with at least two files:
The plugin source file: hello_world_plugin.cpp
The plugin build file: CMakeLists.txt
Hello World Source Files
Lets start with the plugin source code:
// Copyright DEWETRON GmbH 2022
#include "odkfw_software_channel_plugin.h"

static const char* PLUGIN_MANIFEST =
R"XML(<?xml version="1.0"?>
<OxygenPlugin name="HELLO_WORLD" version="1.0"
 uuid="0b9ae54e-7eaa-4b11-9abd-b1154e596f9b">
  <Info name="Quickstart: Hello World">
    <Vendor name="Example Company"/>
    <Description>Simplest plugin</Description>
  </Info>
  <Host minimum_version="6.0"/>
</OxygenPlugin>
)XML";

using namespace odk::framework;

class HelloWorldChannel : public SoftwareChannelInstance
{
public:
    HelloWorldChannel()
    {
    }

    // Describe how the software channel should be shown in the "Add Channel" dialog
    static odk::RegisterSoftwareChannel getSoftwareChannelInfo()
    {
        odk::RegisterSoftwareChannel telegram;
        telegram.m_display_name = "Quickstart: Hello World";
        telegram.m_service_name = "CreateChannel";
        telegram.m_display_group = "Examples";
        telegram.m_description = "Simplest plugin possible";
        telegram.m_analysis_capable = true;

        return telegram;
    }

    bool update() override
    {
        return true;
    }

    void create(odk::IfHost* host) override
    {
    }

    bool configure(
        const odk::UpdateChannelsTelegram& request,
        std::map<std::uint32_t, std::uint32_t>& channel_id_map) override
    {
        configureFromTelegram(request, channel_id_map);
        return true;
    }

    void prepareProcessing(odk::IfHost* host) override
    {
    }

    void process(ProcessingContext& context, odk::IfHost *host) override
    {
    }
private:
};

class HelloWorldPlugin : public SoftwareChannelPlugin<HelloWorldChannel>
{
public:
};

OXY_REGISTER_PLUGIN1("HELLO_WORLD", PLUGIN_MANIFEST, HelloWorldPlugin);
This small (but complete) plugin source code describes the Hello World plugin. It defines the necessary plugin manifest, defines the plugin channel class HelloWorldChannel (more or less empty), and the plugin class HelloWorldPlugin (also empty).
OXY_REGISTER_PLUGIN1(…) is needed to register the plugin with the Oxygen plugin loader.
The second necessary file is CMakeLists.txt. It contains the necessary build instructions for IDE (and compiler) to translate the plugin source code to a valid binary plugin file.
#
# Oxygen Hello World
#
cmake_minimum_required(VERSION 3.16)

# Name of the plugin project and compiled plugin file
set(LIBNAME hello_world)
# This is just any stable GUID to help Visual Studio identify the project for rebuilds
set("${LIBNAME}_GUID_CMAKE" "8c15e366-e94f-4870-8ec1-0db0b342994c" CACHE INTERNAL "remove this and Visual Studio will mess up incremental builds")

#
# Project name
project(HelloWorldPlugin)

#
# C++ Standard, Compiler Flags
set(CMAKE_CXX_STANDARD 17)

#
# Import Oxygen SDK
if (NOT DEFINED ODK_ROOT)
    if (MSVC)
        set(ODK_ROOT "C:/OXYGEN-SDK")
    else()
        set(ODK_ROOT "../OXYGEN-SDK")
    endif()
endif()

# get absolute path of ODK_ROOT
get_filename_component(ODK_ROOT ${ODK_ROOT} ABSOLUTE)

# Expand cmake path to find ODK cmake utilities
set(CMAKE_MODULE_PATH ${CMAKE_MODULE_PATH} ${ODK_ROOT}/cmake)
include(CMakeSettings)
include(OxygenPluginFunctions)

# Build settings and 3rdparty libs
SetupODKEnvironment(${ODK_ROOT})

# Add ODK sources
add_subdirectory(${ODK_ROOT}/odk OXYGEN-SDK)

include_directories(
  SYSTEM
  ${Boost_INCLUDE_DIRS}
)

set(SOURCE_FILES
  hello_world_plugin.cpp
)
source_group("Source Files" FILES ${SOURCE_FILES})

add_library(${LIBNAME} SHARED
  ${SOURCE_FILES}
)

target_link_libraries(${LIBNAME}
  odk_framework
)

SetPluginOutputOptions(${LIBNAME})

#
# add this to Visual Studio group lib
set_target_properties(${LIBNAME} PROPERTIES FOLDER "odk_plugins")
Please create both files using the above source code.
Hello World Building
Now lets build the plugin:
C:\OXYGEN-SDK> cd C:\OXYGEN-PLUGINS\Hello_World
C:\OXYGEN-PLUGINS\Hello_World> mkdir build
C:\OXYGEN-PLUGINS\Hello_World> cd build
C:\OXYGEN-PLUGINS\Hello_World\build> cmake -A x64 -DODK_ROOT=C:\\OXYGEN-SDK ..
-- Building for: Visual Studio 16 2019
-- Selecting Windows SDK version 10.0.18362.0 to target Windows 10.0.19044.
-- The C compiler identification is MSVC 19.29.30142.1
-- The CXX compiler identification is MSVC 19.29.30142.1
-- Check for working C compiler: C:/Program Files (x86)/Microsoft Visual Studio/2019/Professional/VC/Tools/MSVC/14.29.30133/bin/Hostx64/x64/cl.exe
-- Check for working C compiler: C:/Program Files (x86)/Microsoft Visual Studio/2019/Professional/VC/Tools/MSVC/14.29.30133/bin/Hostx64/x64/cl.exe -- works
-- Detecting C compiler ABI info
-- Detecting C compiler ABI info - done
-- Detecting C compile features
-- Detecting C compile features - done
-- Check for working CXX compiler: C:/Program Files (x86)/Microsoft Visual Studio/2019/Professional/VC/Tools/MSVC/14.29.30133/bin/Hostx64/x64/cl.exe
-- Check for working CXX compiler: C:/Program Files (x86)/Microsoft Visual Studio/2019/Professional/VC/Tools/MSVC/14.29.30133/bin/Hostx64/x64/cl.exe -- works -- Detecting CXX compiler ABI info
-- Detecting CXX compiler ABI info - done
-- Detecting CXX compile features
-- Detecting CXX compile features - done
-- Found Boost: C:/OXYGEN-SDK/3rdparty/boost_1_70_0 (found version "1.70.0")
-- Qt rcc found: C:/OXYGEN-SDK/3rdparty/qt/bin/rcc.exe
-- Configuring done
-- Generating done
-- Build files have been written to: C:/OXYGEN-PLUGINS/Hello_World/build
Then start Visual Studio:
C:\OXYGEN-PLUGINS\Hello_World\build> start HelloWorldPlugin.sln
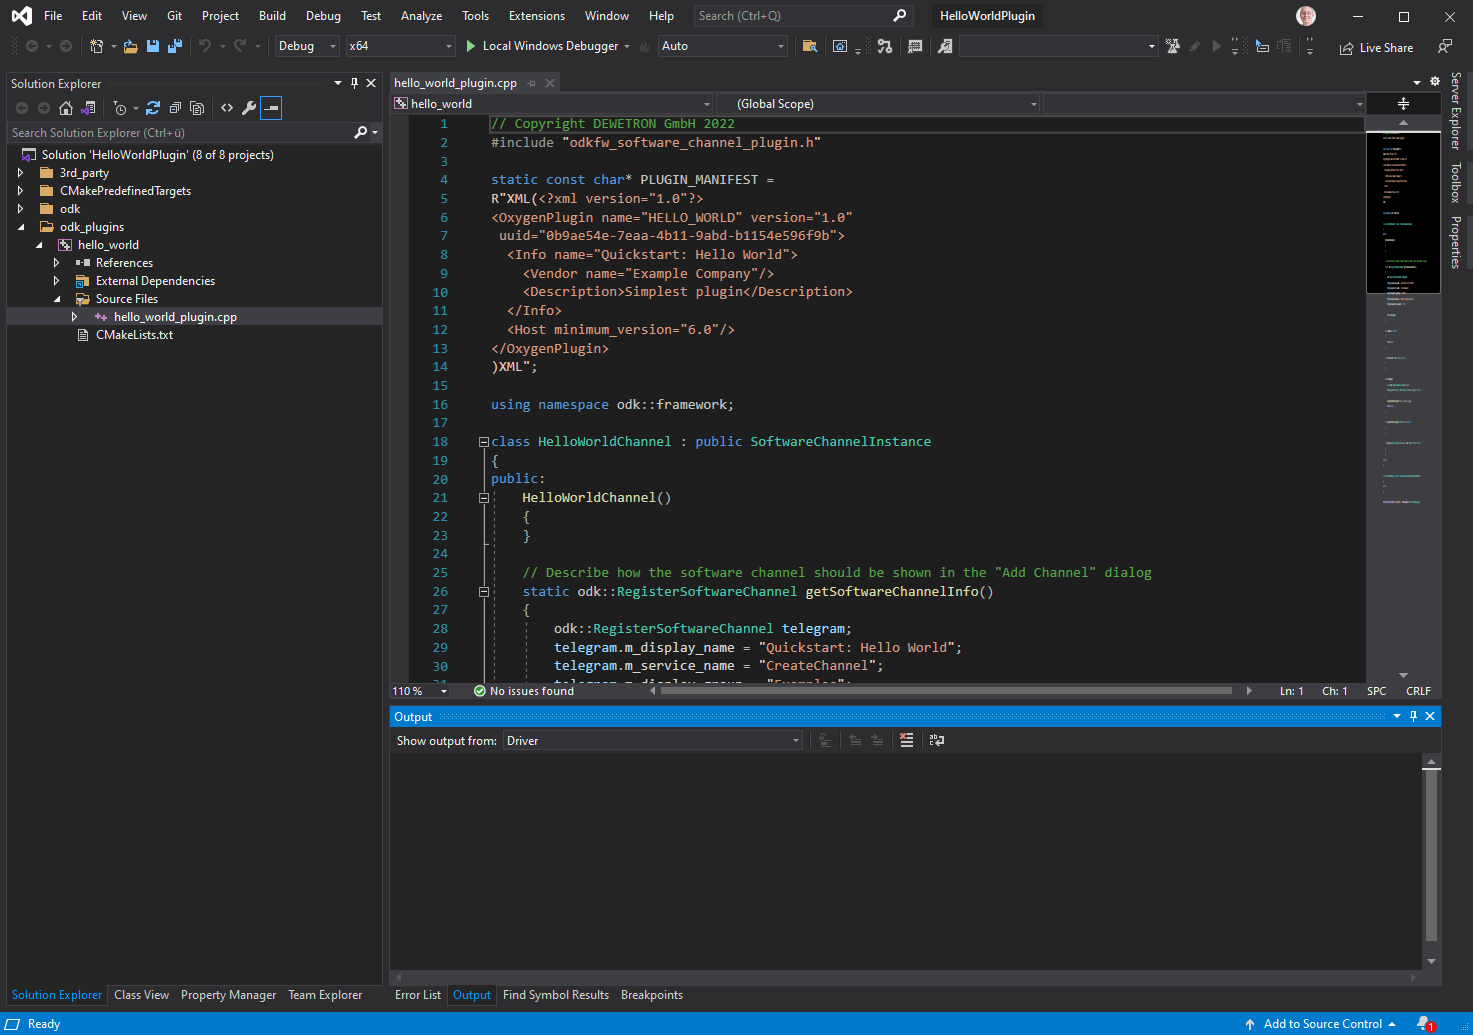
Fig. 8 Hello World in Visual Studio.
Start compiling by pressing Ctrl+Shift+B or selecting Build Solution in the Build menu.

Fig. 9 Building Hello World in Visual Studio.
Hello World Deployment
After building you have to copy the plugin to a valid Oxygen plugin directory:
In Windows these locations are valid for plugins:
C:\Program Files\DEWETRON\OXYGEN\binC:\Users\Public\Documents\Dewetron\Oxygen\Plugins
Now start Oxygen. After Oxygen started look for the plugin in System Setup:

Fig. 10 System Setup shows Hello World plugin
In the Channel List the plugin is listed in the AddChannel dialog:
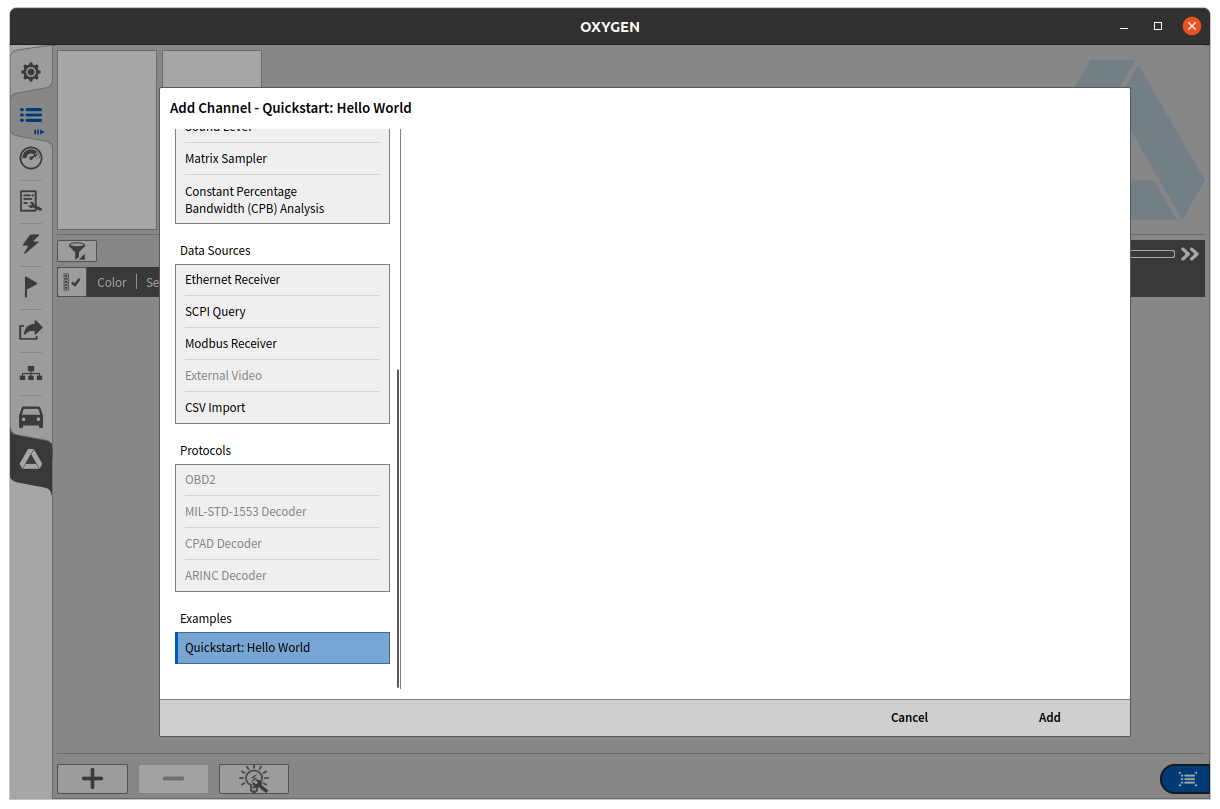
Fig. 11 Hello World in AddChannel Dialog.
Congratulation! You developed, build and tested your first Oxygen plugin!